Gap Settings Tool
Define the four clearance gaps on the edges of a panel face by entering a value for each side.
How it works
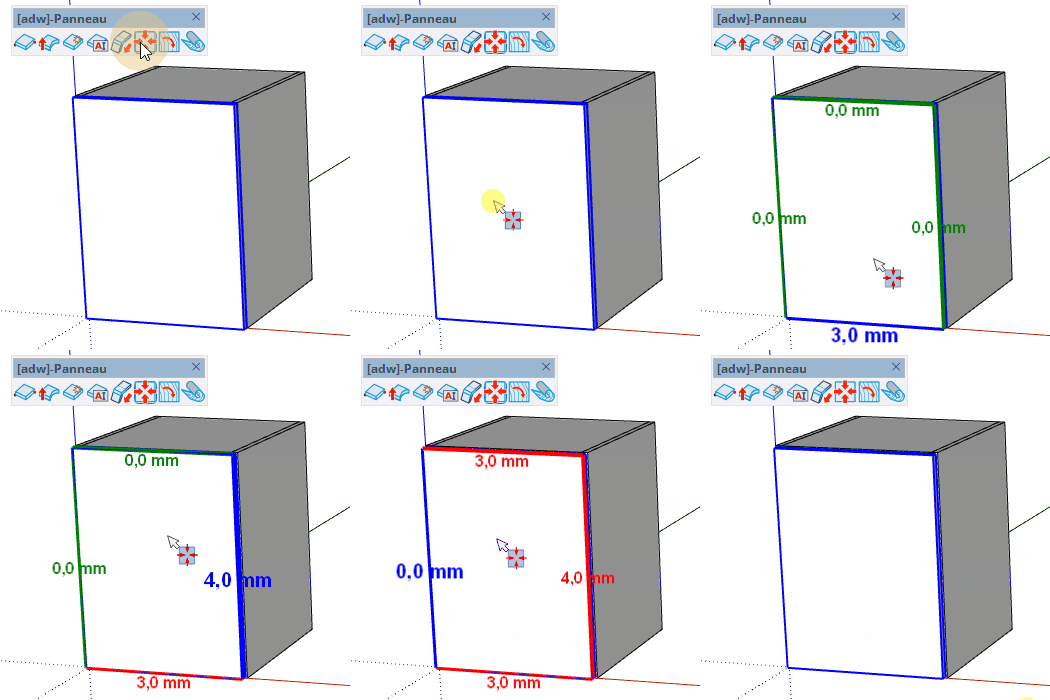
- Click (and hold briefly) on a reference face of a panel — the view zooms to the face
- Each edge of the face is highlighted in turn — type a gap value and press Enter to set it
- Double-click on the opposite face to apply the same gaps by push/pull
Keys
- Esc = Cancel the operation
VCB Input
- After clicking a face: type a gap value for each highlighted edge and press Enter
- The active edge advances automatically after each entry
Tips
- The tool only works on horizontal faces (reference face or opposite face of a panel)
- The view automatically zooms in top-down onto the selected face for easier editing
- Double-clicking a different face applies all the set gaps to the surrounding edges at once
- Gaps cycle back to the first edge after the last one has been set