Veneering Tool
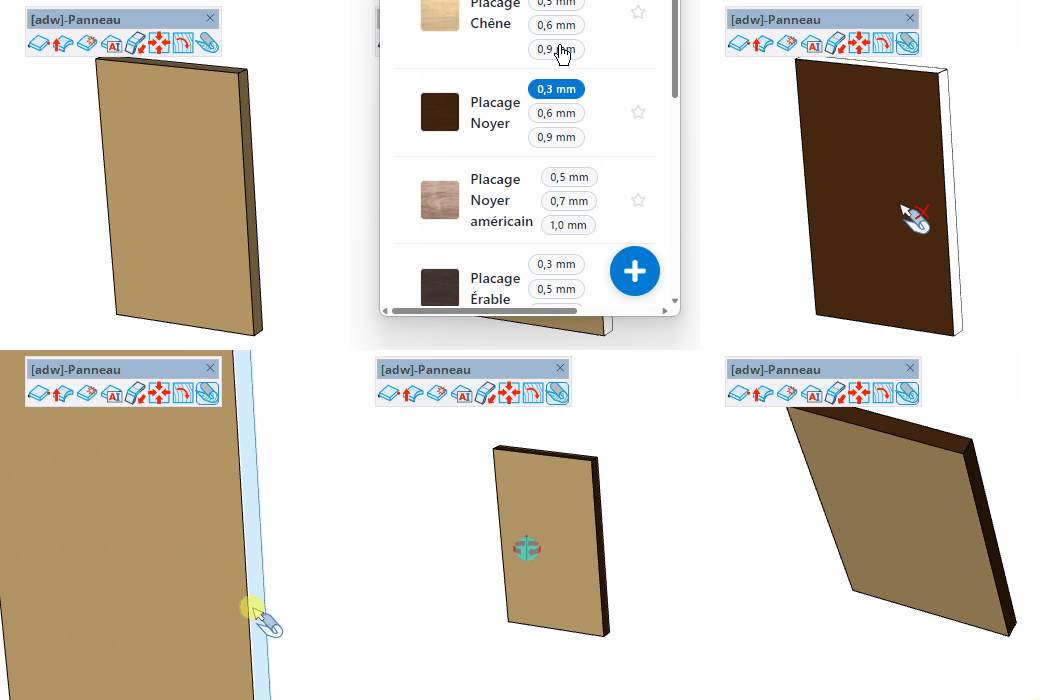
Apply veneers to panel faces (facing / counter-facing) and edges — click a face to apply, click again to remove.
How it works
- Choose the veneer material and thickness in the board selector that opens automatically
- Hover a panel face — click to apply the veneer to that face (facing or counter-facing)
- Hold Ctrl and click an edge face to apply the veneer to the edges
- Click again on a veneered face to remove the veneer
Keys
- Ctrl = Toggle edge mode (veneer on panel edges)
- Shift = Apply the veneer to all instances of the panel at once
- Alt = Toggle edge veneer between + (overlapping) and = (flush)
- Esc = Cancel the operation
Tips
- The board selector opens automatically on activation — pick the veneer first
- Use Shift to veneer every copy of a repeated panel in one click
- Alt controls whether the edge veneer overlaps (+) or sits flush (=) with the facing
- Clicking a face that already has a material removes that veneer — handy for fixing without switching tools